

How To Remove Background Color Photoshop Cs2
I figured I'd include probably the nigh-requested masking taskremoving someone from a background while keeping pilus particular. Nosotros utilise Extract for this, and even if you lot've used Extract dozens of times, at that place's a trick near the end that is then unproblematic, yet so incredibly effective, information technology will modify the way you utilise Excerpt forever, or my name isn't Deke McClelland.
Step Ane
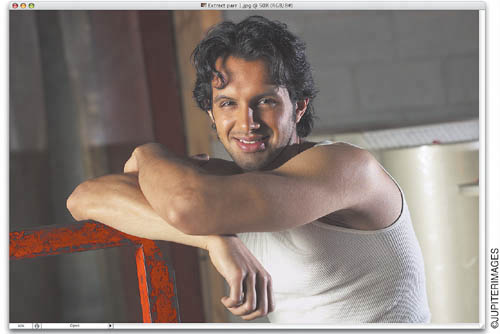
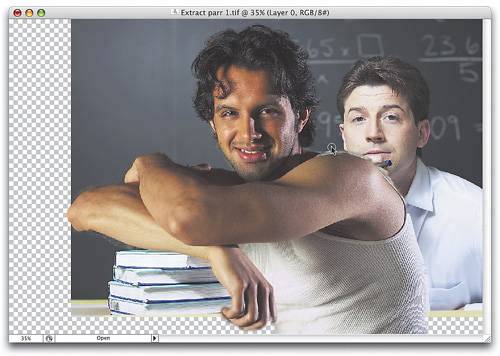
Open up the photo containing a person (or an object) that you desire to extract from its background. Become nether the Filter menu and choose Excerpt (information technology'due south the starting time filter from the meridian).
Footstep Two
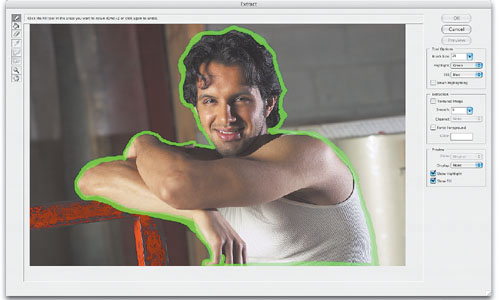
This brings upwards the Extract dialog. Press B to become the Edge Highlighter tool (information technology'southward the meridian tool in Excerpt'south Toolbox and looks like a mark), and trace the edges of the object you lot want to remove. As you trace, go out half the marker edge on the groundwork and one-half on the edge of the object y'all desire to extract.
Tip
Use a small brush size when tracing areas that are well defined (similar along the shirt), and a very large brush for areas that are less defined (such equally flyaway hair). You can change the brush size by belongings down the Left Bracket key to brand it smaller or the Right Subclass to make it larger.
Pace Three
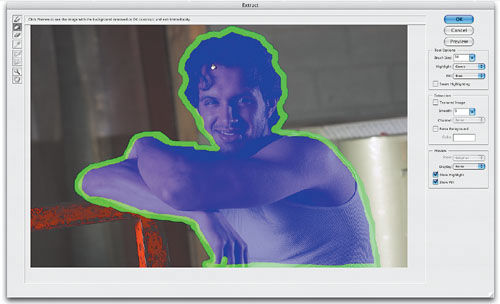
After your Highlighter edge is in place, you at present take to tell Photoshop what parts of the photo to retain when extracting. This is pretty simpleyou simply press G to switch to the Fill tool (it'due south the 2d tool from the top in Extract's Toolbox and looks like a pigment saucepan), and click information technology once inside the Highlighter edge border you drew earlier. This fills the within of your highlighter border with a bluish tint.
Footstep Four
If the blueish tint spills out into the residue of your photograph when y'all click the Fill tool, that means your discipline isn't completely enclosed by the edge border. If that happens, simply press Command-Z (PC: Control-Z) to undo, then take the Border Highlighter and make sure there are no gaps at the bottom or sides of your border. At present you can click on the Preview button to see how your extraction looks.
Step Five
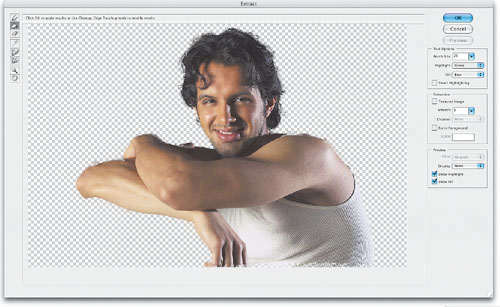
It's time to take a skillful look at the photo and see if Extract did what yous really wanted information technology to. Namely, did it piece of work on the hair, which is the hard-to-select area? If information technology worked, and then click OK considering fixing the residuum of the photo is a breeze, as you'll come across. Even if parts of his clothes are dropping out, or in that location are dropouts in his confront, hands, etc., don't sweat itas long every bit the edge of the pilus looks expert, go ahead and click OK to perform the extraction and your image will announced on an editable layer (Layer 0).
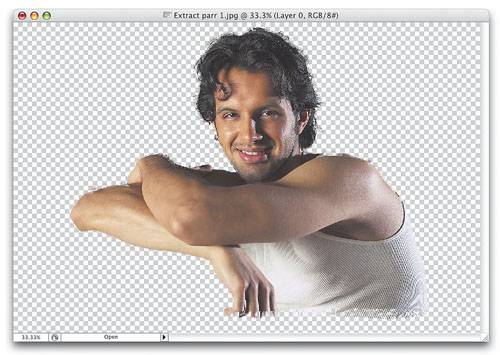
Step Half dozen
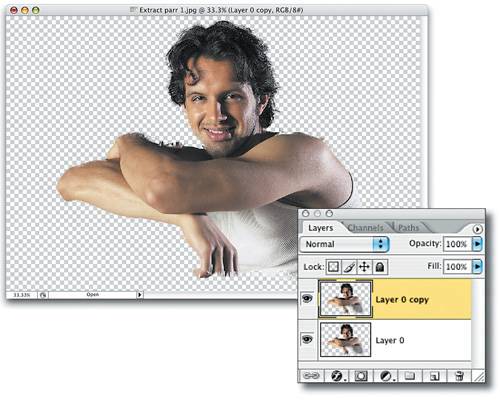
Now that the extraction is done, it's "fix-up" fourth dimension. Here, you can run across dropouts (slightly transparent areas) in his pilus, a few little spots in his shirt, and a couple of little spots in other places. Commencement by simply duplicating the layer. That's correct, but press Command-J (PC: Control-J). The mere act of duplicating the layer will fix about 90% of the dropouts in your photo. It sounds weird, but it works amazingly well, and when you try it, you'll be astounded. Press Command-E (PC: Control-East) to merge these two layers.
Step 7
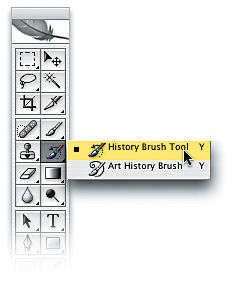
For the residue of the dropouts, press Y to get the History Brush tool and but paint over these areas. The History Brush will pigment those missing pieces back in because it'southward really an "undo on a brush." So, if part of your subject drops out, employ the History Brush to paint it right dorsum in. You lot tin usually set the dropouts in nigh 2 minutes using this technique.
Step 8
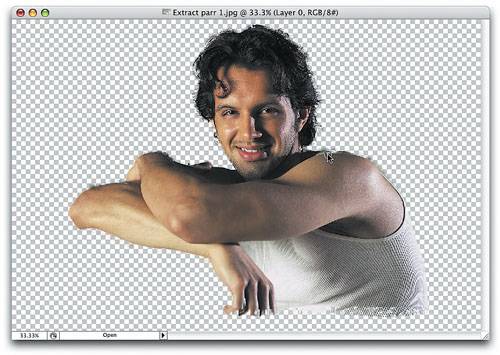
During the fix-up stage, I'm painting over dropouts forth the man's shoulder. As you see, using the History Brush paints the original image back in.
Stride Nine
Next, open the photo that you want to utilize as a background behind your extracted person. It's best to drag this background photo onto your extracted-person document, considering as long as you work in the same document where yous extracted, y'all'll have access to the History Brush for your extracted epitome. That mode, if you see a dropout when you bring in the groundwork, you can render to that layer and quickly touch it up with the History Castor. And so press Five to switch to the Motion tool, and drag-and-drop this photograph on top of your extracted image. The background volition appear on top of your extracted image on a separate layer (Layer ane) in the Layers palette.

Step X
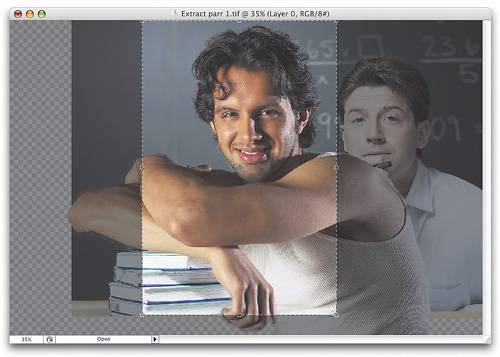
In the Layers palette, elevate the layer with your background photo (Layer 1) beneath the layer with your extracted photo, putting your extracted person in front of the background (equally shown here, where the man in the groundwork photo is partially covered by the extracted man). Using the Move tool, position this background layer until your extracted person appears where you want him. Then, y'all'll usually accept to switch to the Eraser tool (E) to erase any leftover "junk" exterior his hair, along his shirt, etc., but you can usually make clean upward these leftovers pretty easily in one case you run into them over the background.
Step Xi
In this example, considering I only want part of the background to appear, I'm stuck with a lot of empty infinite and unneeded areas. Press the alphabetic character C to get the Crop tool, drag a cropping border effectually the areas you want to continue, and and then printing Render (PC: Enter) to crop the photo down to size. Now that the photo is cropped, a new problem is visiblehis skin tone looks too warm for the bluish background we've placed him on (and this is something you'll deal with often when combining photosthe tones have to match to look realistic).
Step Twelve
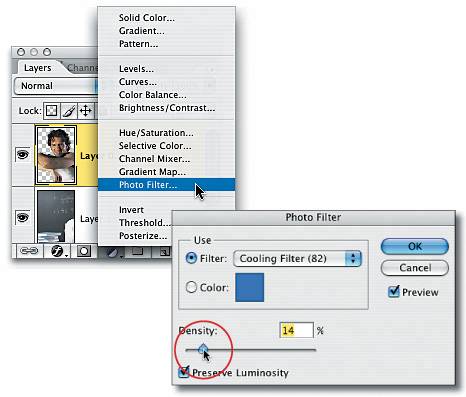
To cool down his warm skin tones, make certain the top layer is active in the Layers palette, and then go nether the Create New Adjustment Layer pop-up carte at the bottom of the Layers palette and choose Photo Filter. These Photo Filters replicate the traditional screw-on lens filters used with picture show cameras to accommodate bad lighting situations.
Step Thirteen
In the Photo Filter dialog, you lot tin cull a filter from the Filter pop-up carte (like the Cooling Filter [82] I chose here), or choose to make full with a solid color. You tin can also control the Density of the consequence using the Density slider (I lowered it to xiv%). Click OK and the warm areas are cooled, so your subject's flesh tones now better fit the background image yous dragged him onto.
The original photo

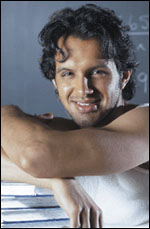
The subject extracted, placed onto a different background, re-cropped, and his tone cooled to match the new background.

How To Remove Background Color Photoshop Cs2,
Source: https://flylib.com/books/en/1.466.1.102/1/
Posted by: gordonfastir.blogspot.com
0 Response to "How To Remove Background Color Photoshop Cs2"
Post a Comment